# Smart ChatBot Mobile App
Smart ChatBot introduced mobile apps for android & iOS, in this help documentation, we will show you how to use the mobile app with Smart ChatBot seamlessly.
# Download the mobile app
You can download the mobile app from the link below or search “Smart ChatBot live chat” in AppStore, or search “Smart ChatBot” in Google Play.
# Features of the Smart ChatBot app
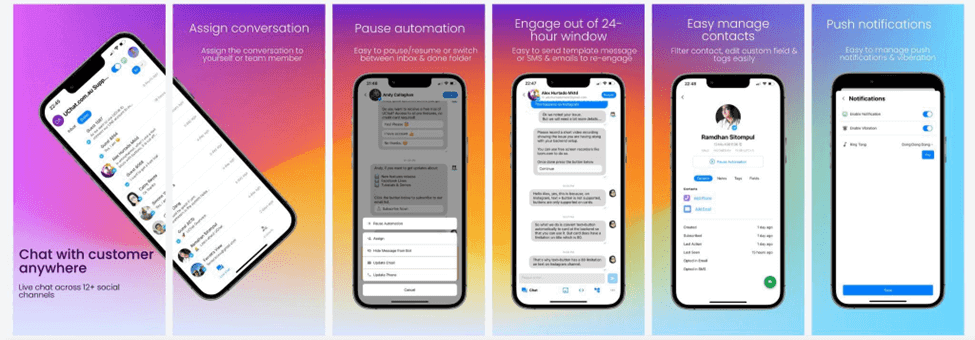
With the Smart ChatBot mobile app, you can:
- Assign the conversation to yourself or team members, and build your ticketing system. Seamless integrates right in the flow builder with the “assign team member” action
- Easy to pause/resume automation , easy to switch between inbox & done folder, so that you can always keep track of the tickets
- Re-engaged with your customer: you can send template messages or SMS & email to reach customers that are out of the 24-hour window.
- Easily manage contacts: You can get all the contacts from different social channels in one place, you can filter the contacts based on tags, custom fields or channels, and even edit tags or user custom fields.
- Push notifications: You can easily turn on or off the push notifications, and also select the ringtone you like, always get in touch with your contacts.
We will talk about the details one by one.
# Set up your live chat settings
Depending on the live chat settings you have, it will trigger the live chat to our mobile apps or the web chat platform we integrate with.
You can go to the settings in your current channel, and then select “Live Chat”, you will find the settings below:
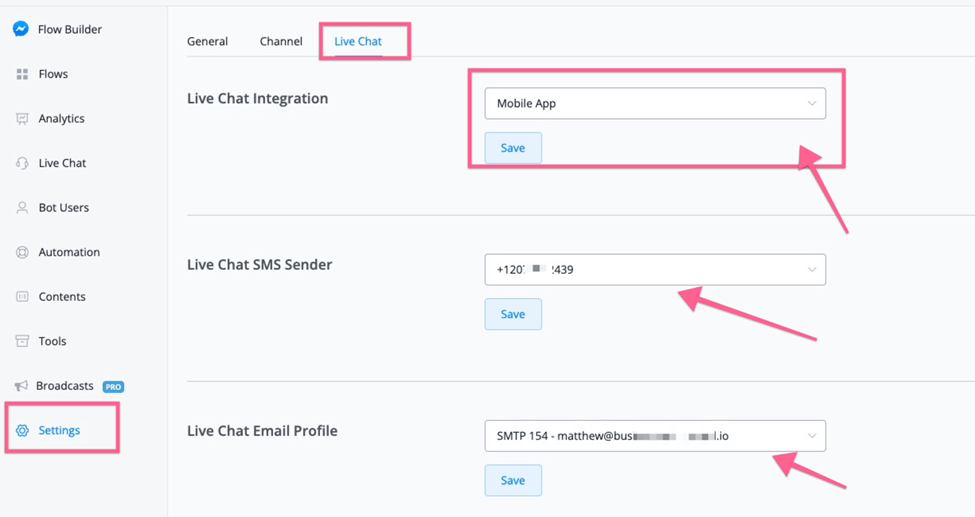
Apart from using mobile apps to handle your live chats, you will be able to use other web chat platforms in the future.
So here you can select mobile apps, and then the conversation will be pushed to our mobile apps.
Regarding SMS & Email profile settings, Smart ChatBot mobile apps allow you to reach out to the user if the user is out of the contact window( for messenger, Instagram, WhatsApp, it’s the 24-hour window, for Google Business messenger, it’s 30 days, etc)
If you have set up your SMS & email provider, you will be able to send SMS and email to the user in the mobile apps & our live chat window.
# Assign the conversation(Ticketing system
# Assign the conversation in the flow builder
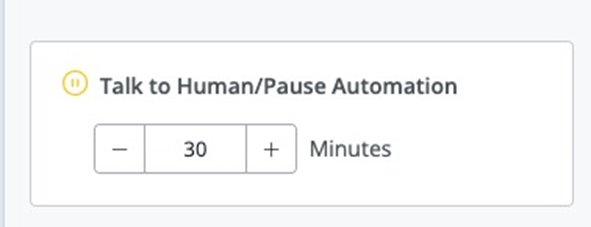
After you use the “Talk to human/Pause automation” action in the flow builder, it will pause the bot, and then activate the live chat.
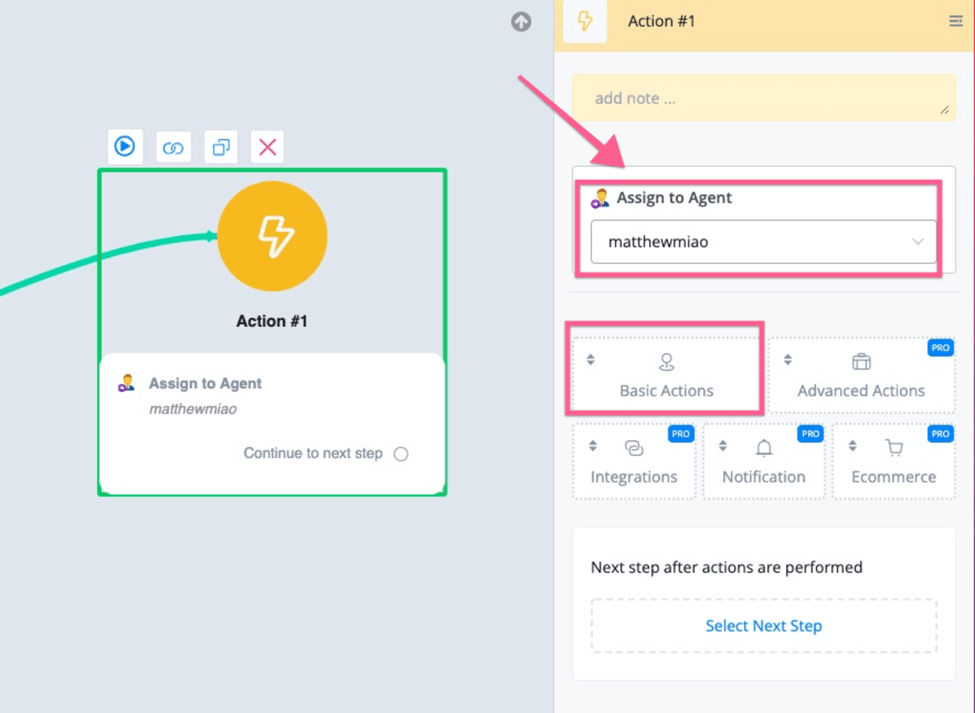
You can find the “assign to agent” action in the basic actions, and then you can select the team members you want to assign to.
You can set up your own rules to assign the conversation once the user “pauses the notification”, for example, you can use “Split” to randomize and assign the conversation/tickets.
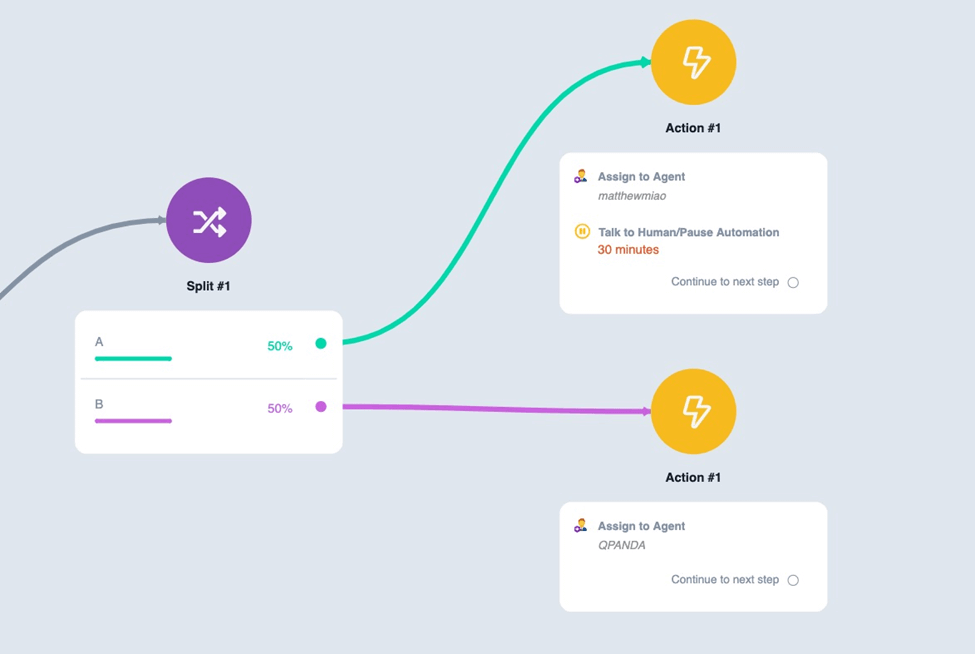
You can also assign the conversation according to the time & week of the day.
You can also assign the conversation based on the selection the user makes in the bot. For example, they want to reach out to different departments of your business.
# Assign the conversation in the live chat window
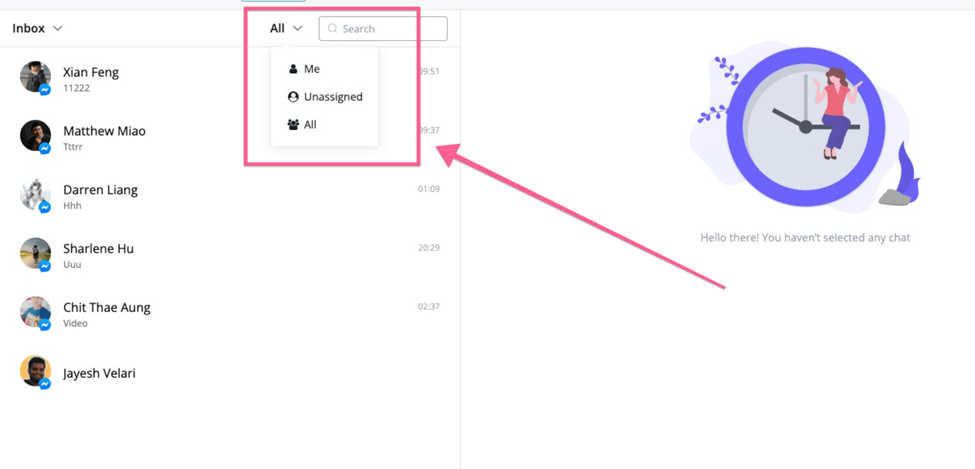
In the live chat window, you can first check the “unassigned” and “all” conversations, and also the conversation assigned to you.
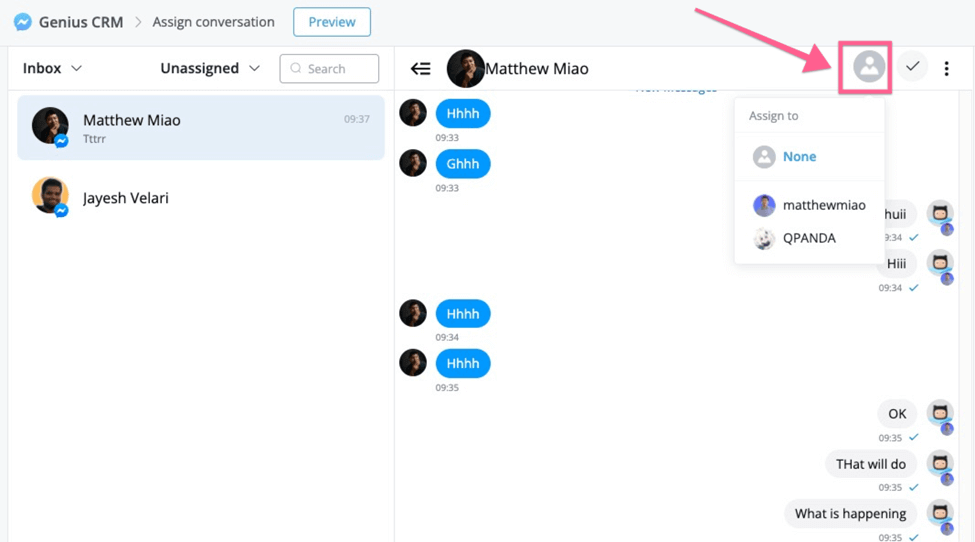
If you go to the unassigned conversation, you can click the “icon” on the live chat, and you can then select your team member to assign this conversation.
# Assign the conversation to Smart ChatBot mobile app
You can also assign the conversation in our mobile app, you can select the “unassigned” conversation from the top right corner.
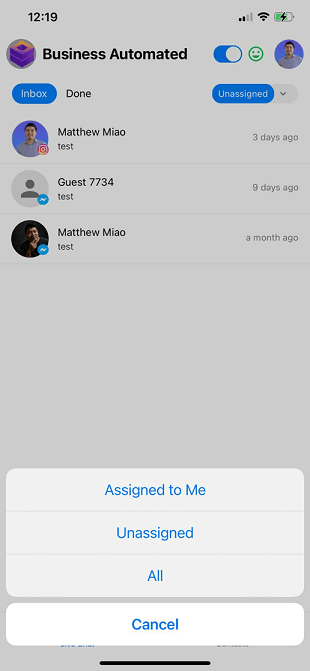
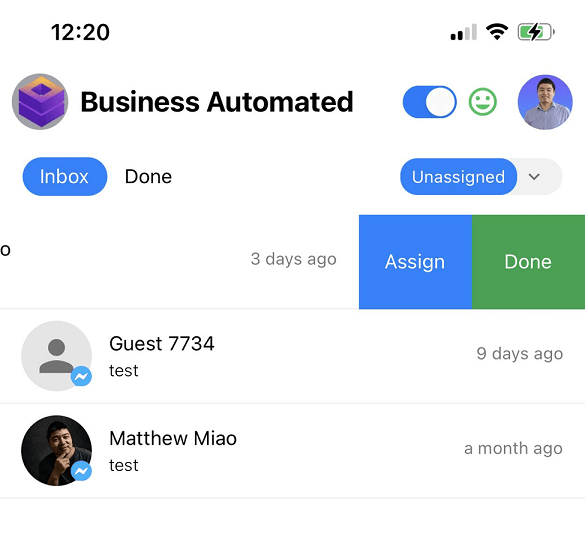
Then it will pull out all the unassigned conversations, you can swipe the conversation to the left and then select the “assign” action to assign to one of your team members.
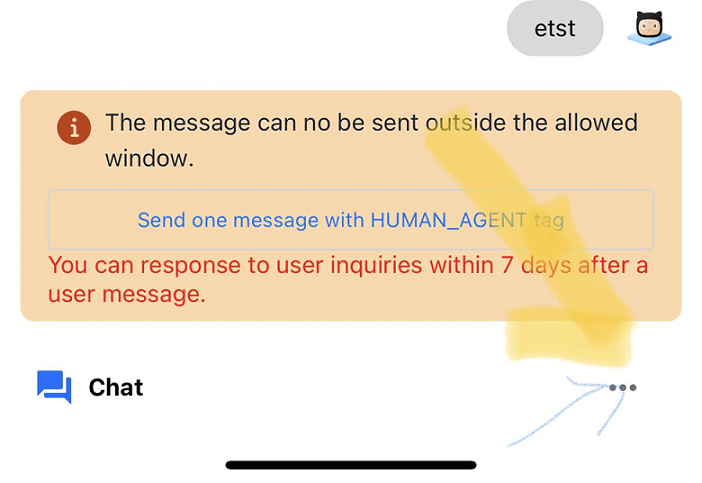
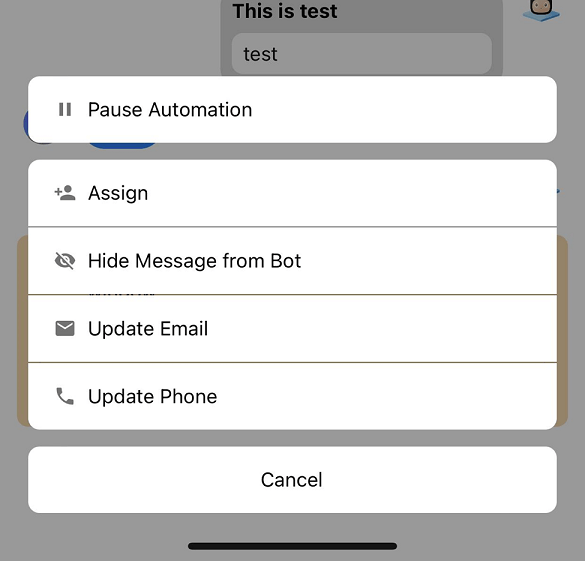
You can also click into the conversation, and then select the top bottom right “...”, this will pop up more options for the current user.
And then you can select “Assign” and then select the team member.
# Switch between inbox & done folder
Inbox & done folder is a nice way for you to organize the conversations. You can “mark the conversation” as done if the ticket is resolved.
# Switch in the flow builder
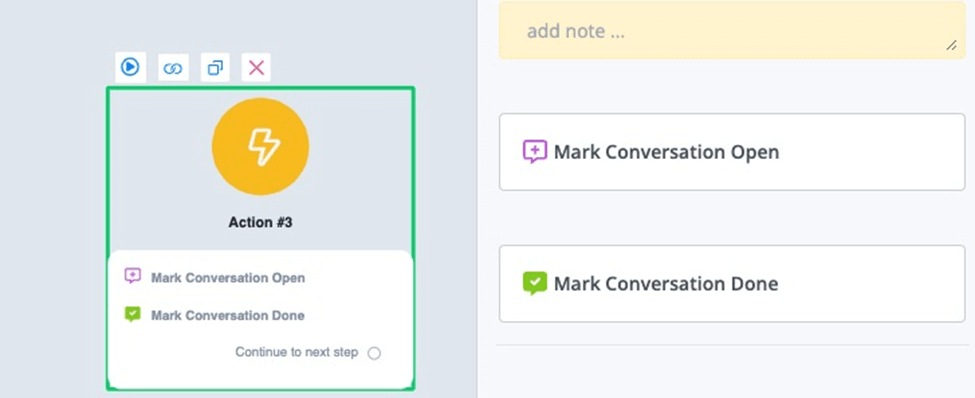
You can use the “mark conversation open” & “mark conversation done” action in the basic action to switch the conversation between the inbox & done folder. Please note this doesn’t have anything to do with pause/resume automation.
# Switch in the live chat
In the live chat window on the Smart ChatBot desktop, you can click the icon below to mark the conversation as done.
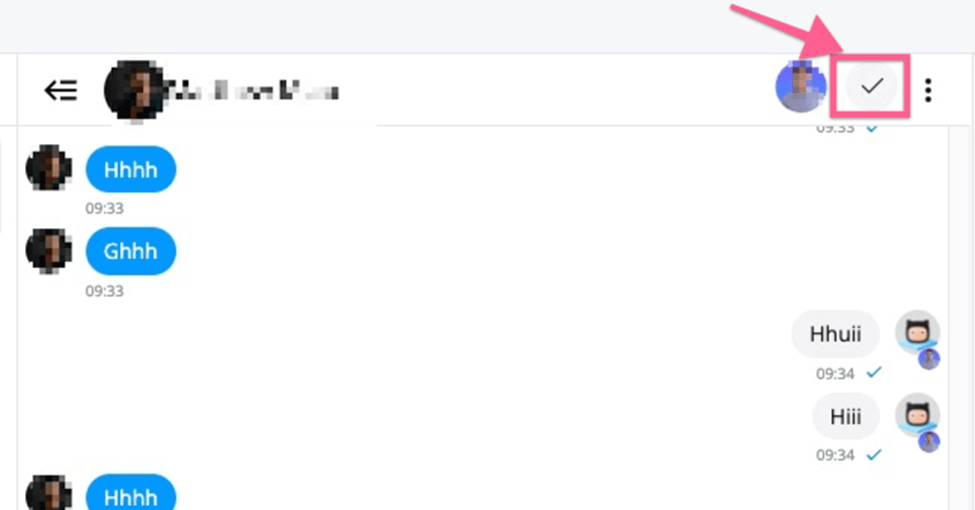
And if you click the inbox dropdown, you can switch to the done folder for all the conversations.
# Switch in the mobile app
You can switch between inbox/done right from the navigation, as per the screenshot below:
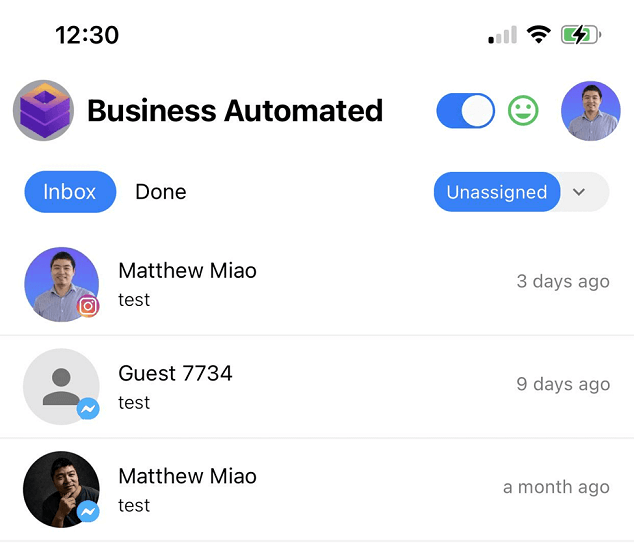
If you click into the conversation, you can find the “Reopen” & “Done” at the top of the navigation, you can easily switch between the inbox & done folder.

# Pause/Resume automation
If you use the “pause automation” action in the flow builder, then all the messages will forward to the live chat solution you select. Smart ChatBot mobile app is just one of them.
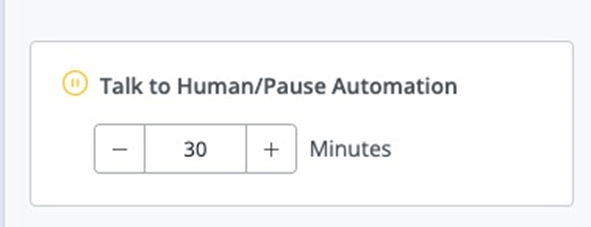
Also if you click into detailed conversations, you will find the option to “pause” or “resume” automation.
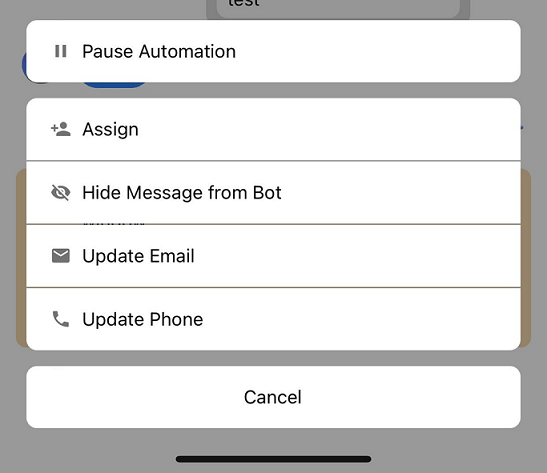
For all the already paused conversations, you will find the little “pause” icon in the conversation lists.
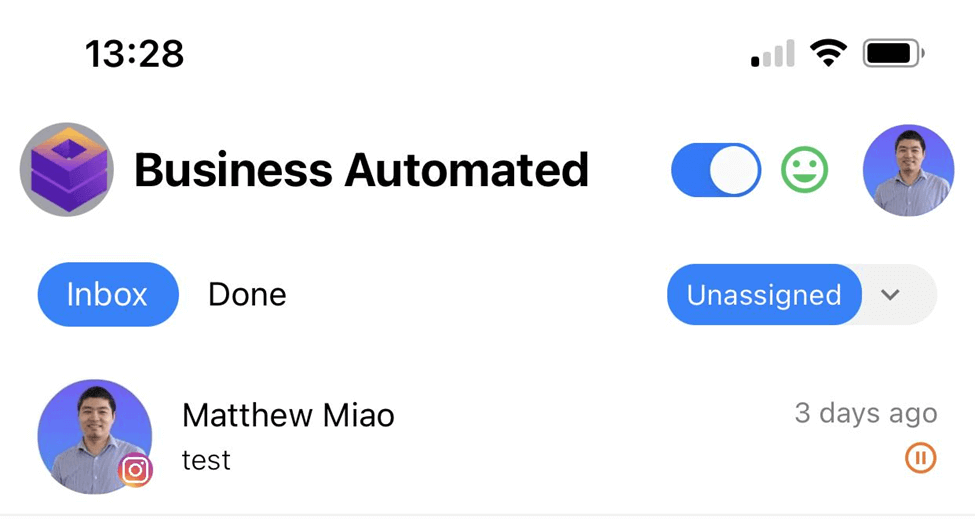
Also, as the agent, if you reply to the user directly(if the contacts are within the engagement window), you will pause the automation for the user automatically, by default, it’s 30 mins, and you can add more time to the pause.
After the pause time passes, the user will go back to the chatbot automation.
Also if you send the subflow to the user, after the user receives the subflow, they will go back to the chatbot automatically.
# Live chat with customer
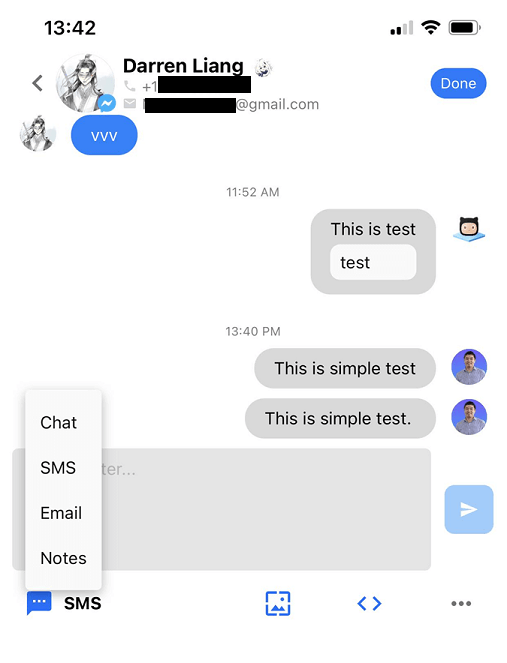
During the live chat with your customers, we support you to send the chat, SMS, and Email(if the contact has these values).
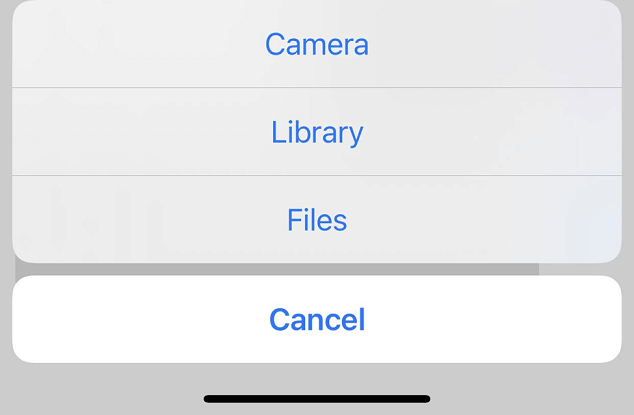
Also, you will be able to send images, and files, and even take a picture with your camera.
You will also be able to send the flows right in the live chat.
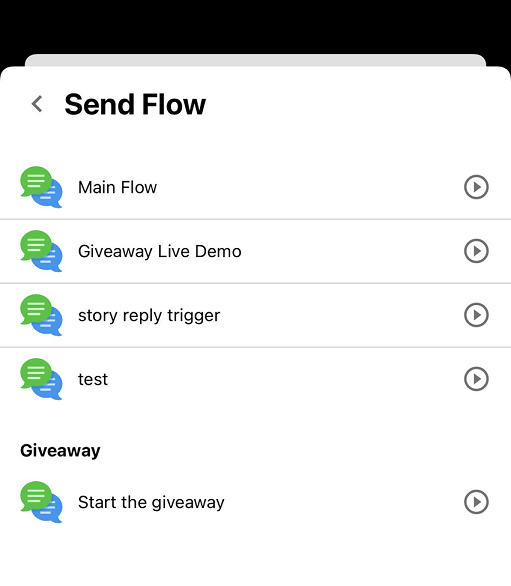
We also support you to send canned responses - Shortcut right in the live chat.
You need to first set up all the shortcuts in Smart ChatBot.
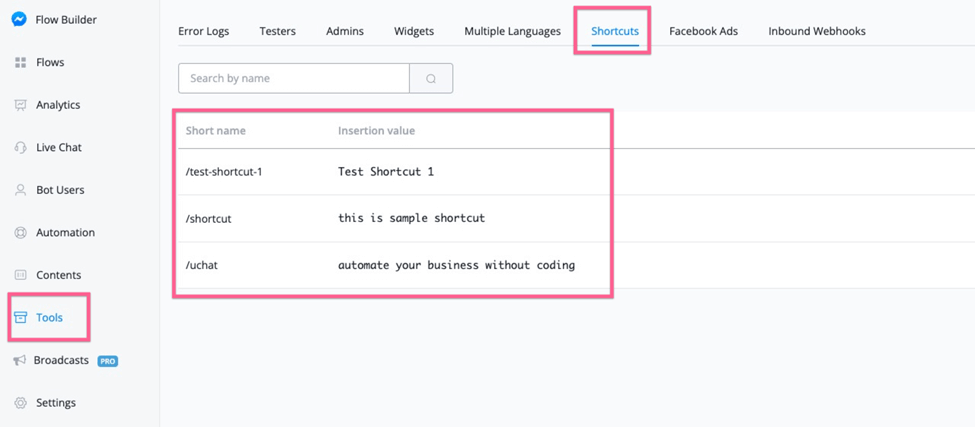
After you set up the shortcut in Smart ChatBot, you will be able to select and use these canned responses in the mobile app(notes, chat, email, SMS)

In the live chat conversation window, you will be able to also update the email or phone number, and also hide the messages from the bot.
If you hide the messages from the bot, then it will only show the live chat with the contacts, all the bot-engaged conversations will be hidden.
# Easily manage contacts
You can also easily manage all the contacts you have in your chatbot.
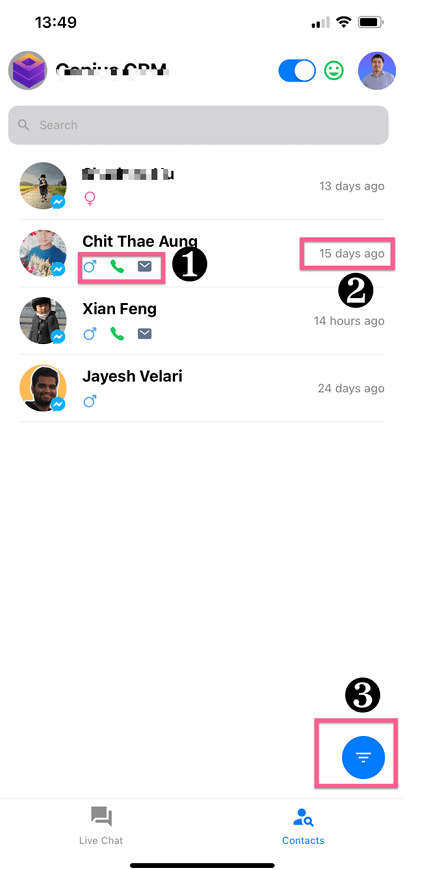
Point 1: You will find the 3 icons under the contact, that will show up the gender, email or phone number status of the user. Also, you will find the social channel icon at the bottom right of the contacts.
Point 2: You will see the last engaged time with the user, please note different social channels have different windows through that you can contact the user.
Point 3: you will be able to filter the contact by various rules
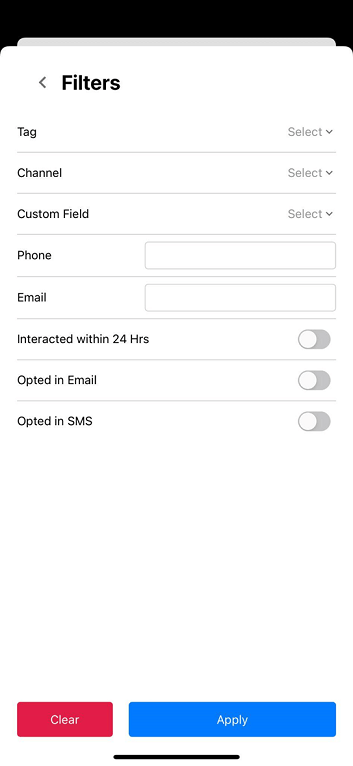
You can filter the contacts by tag, custom field, Channel, phone number, email, and interaction within the 24-hour window, or if they opt-in email or SMS.
If you click on the contacts, you will find more details about the contacts.
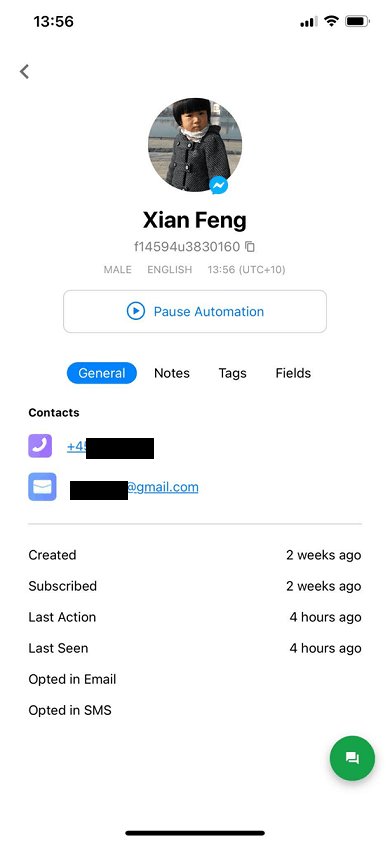
In the general tab, you will find the phone number, email, created time, subscribed time, last interaction time, last seen, and also the opt-in status for email & SMS.
You can also easily update the phone number and email.
You can also switch different tabs to check the notes, tags, and custom fields of the user. You can delete the tags, or make changes to the user's custom fields.
If you click the green chat icon at the bottom right, you will be redirected to the conversation with the contact.
You can start a conversation with the user if you want. You can send SMS or email to the user if they are out of the contact window.
You can manually pause the automation right under the contact profile image.
# Push notifications
If you set up the live chat to mobile apps. So every “pause automation” will stop the automation, and then the messages following the action will trigger the live chat to your mobile app.
As long as you don’t log out of your mobile app, you will receive a push notification about the live chat.
After you click on the notification, it will take you to the conversation right away.
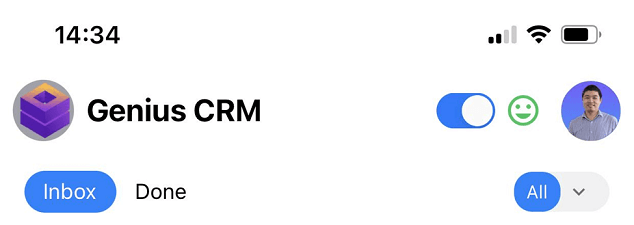
You can easily switch on/off the push notifications.
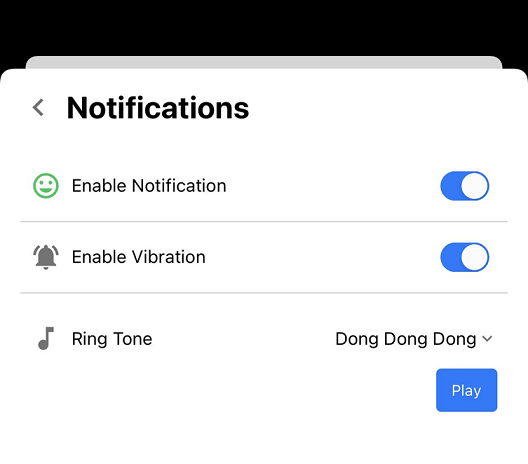
Also, you can go to the settings to manage your push notification settings.
Also, we have built an action in the flow builder, you can trigger a push notification to the mobile app or the 3rd party live chat agent you are using.
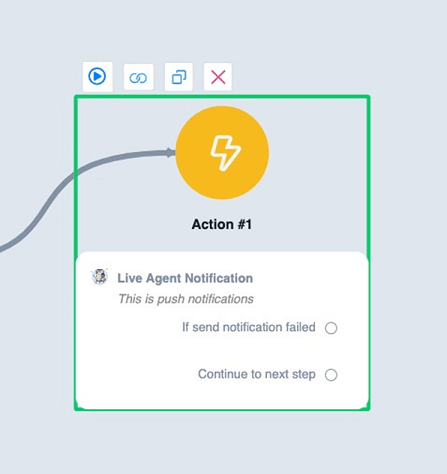
You will find this action in the action - Notifications.
Please note, that this will send push notifications to the live chat solution you chose under the live chat settings.
If you select the mobile app, it will send the push notification to the mobile app, if you select the intercom, then it will send the push notification to the intercom.
# Switch workspaces/bots
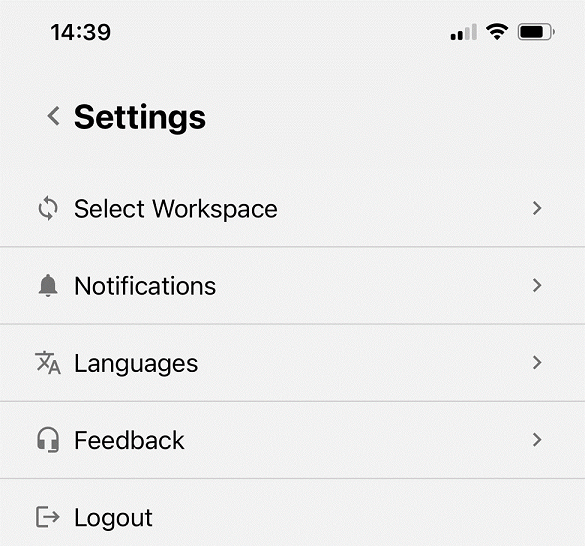
In Smart ChatBot, we support you to create or join multiple workspaces, you can easily switch the workspace and chatbot from the settings
# Switch language
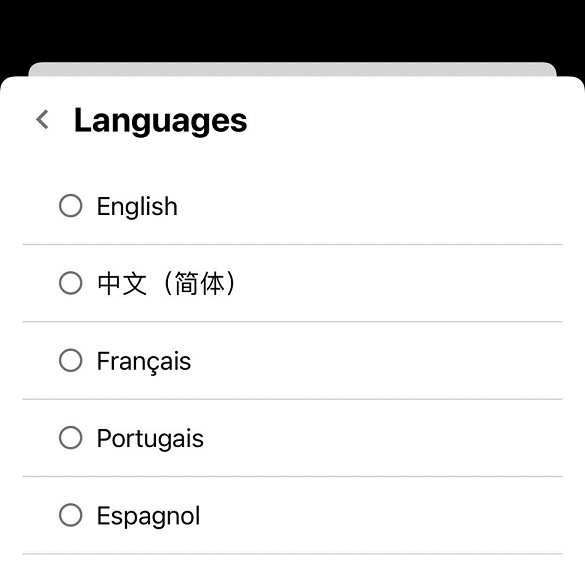
You can easily switch to different languages, currently, we support:
- English
- Chinese
- French
- Portuguese
- Spanish
You can make the changes as per the screenshot below
# Submit suggestions or bugs
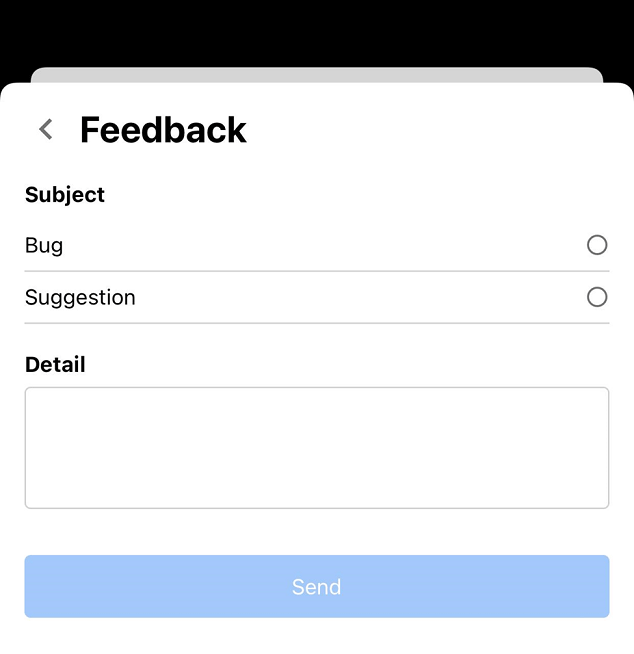
If you are facing bugs or have suggestions to help us improve, please submit your question or suggestions in the feedback section.
